 Blurwise
Guide
How to use Blurwise, step by step
From dropping in a file to exporting the anonymised result — the whole workflow, with a screenshot of every stage. Everything runs on your own computer; nothing is ever uploaded.
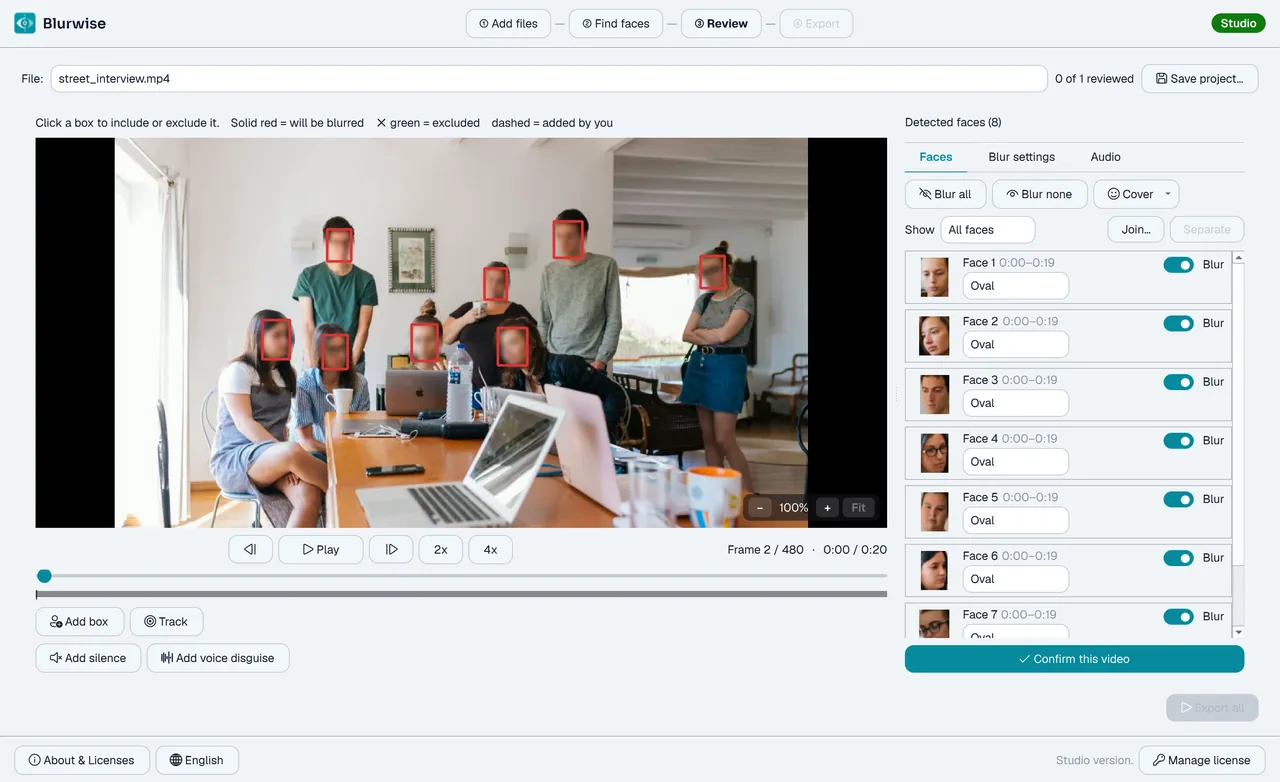
The workflow in four phases
Blurwise works on every file in your list together: it finds the faces in all of them, then you review them all at once, then it exports them. Videos and photos can share the same list.
Add files
Add your videos or photos and pick the settings.
Find faces
The app finds and tracks every face automatically.
Review
You decide, face by face, what to blur.
Export
Get your finished, anonymised files.
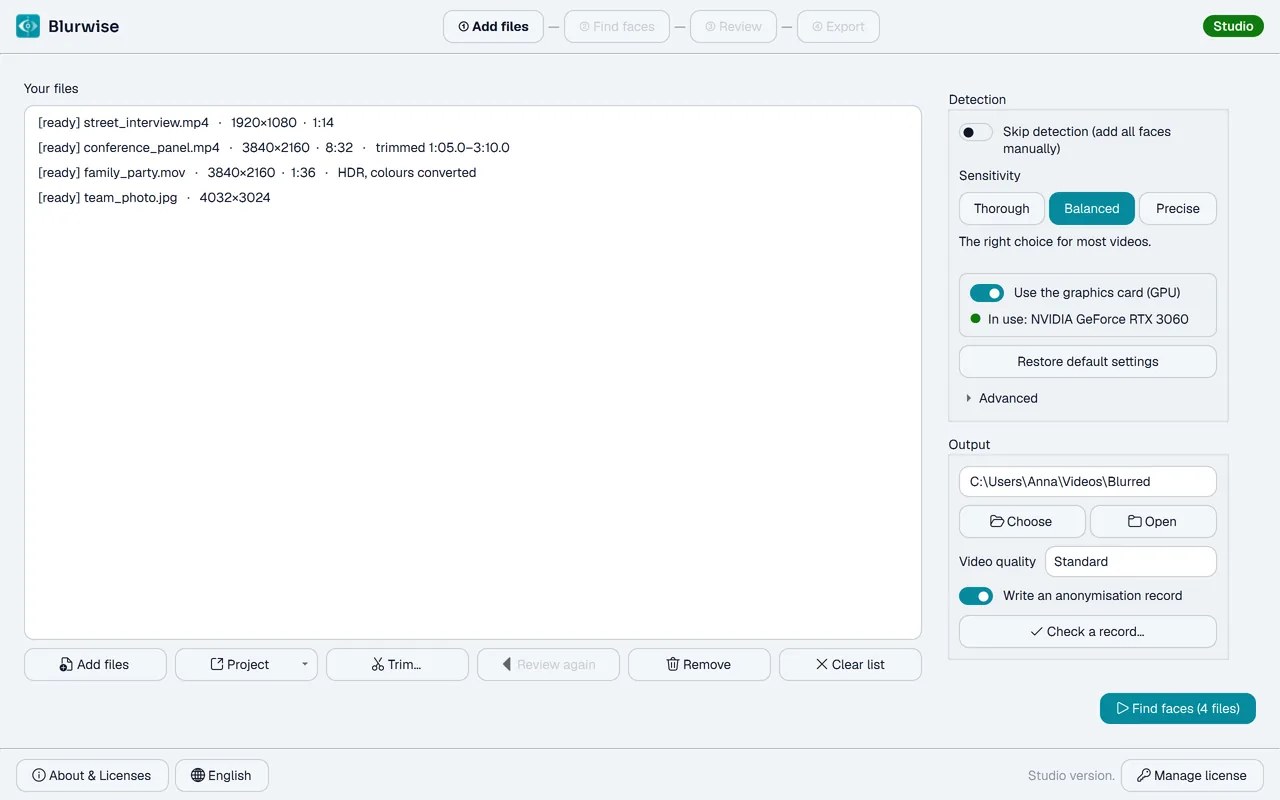
Add your files
Drag your videos and photos into the list, or click Add files — you can mix clips and stills freely, and HDR videos are fine: their colours are converted automatically. Choose an output folder and a Video quality (Standard suits most uses; High keeps more detail in larger files), and leave “Write an anonymisation record” on if you may need to prove later what was anonymised. Then press Find faces.
- Sensitivity sets how many faces Blurwise looks for: Thorough also catches turned or moving faces, Balanced suits most videos, Precise only takes clear ones. The exact value is under Advanced.
- Something not behaving as expected? Restore default settings puts the remembered detection and review settings back to their defaults.
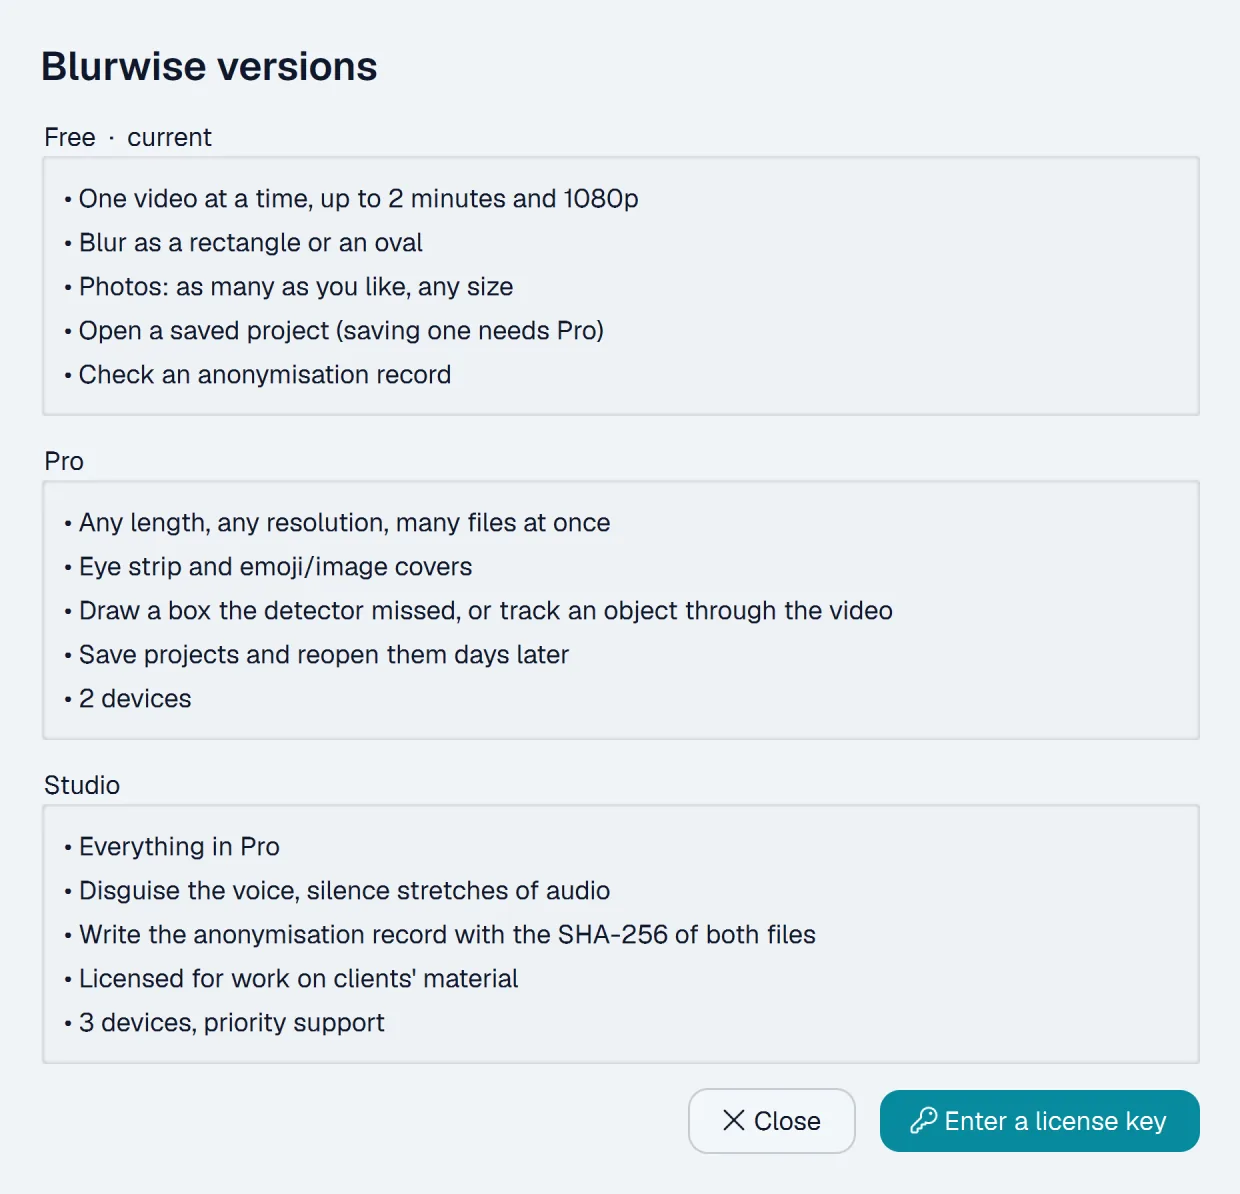
- Pro and Studio process several videos in one pass; Free works on one video at a time, with as many photos as you like.
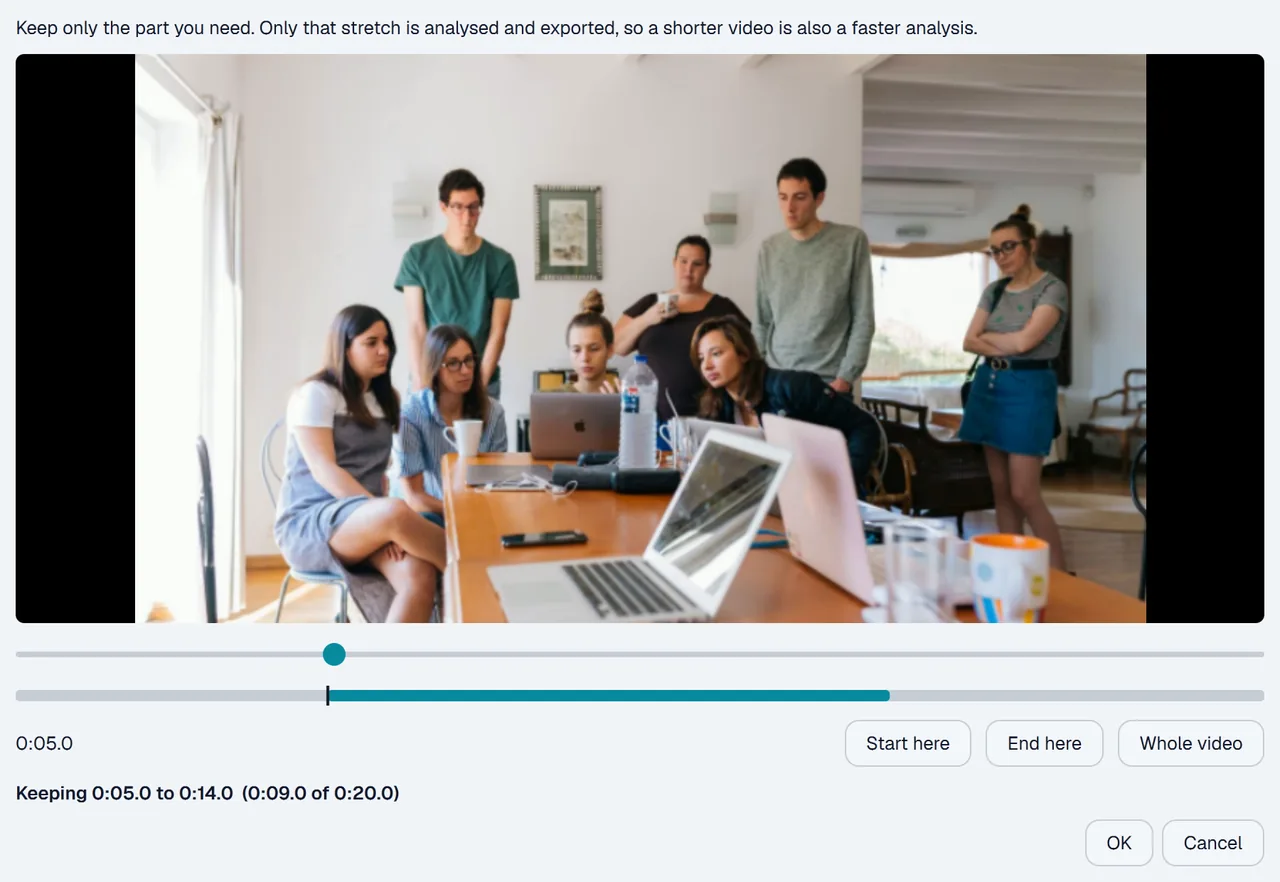
Trim a long video
Only need part of a recording? Double-click it in the list (or select it and press Trim…), play to where the part you need begins and press Start here, then to where it ends and press End here. Only that stretch is analysed and exported, so a long recording is ready much sooner. One stretch per video.
- The I and O keys work as Start here and End here.
- On Free a video is limited to its first two minutes; choosing which stretch to keep needs Pro or Studio.
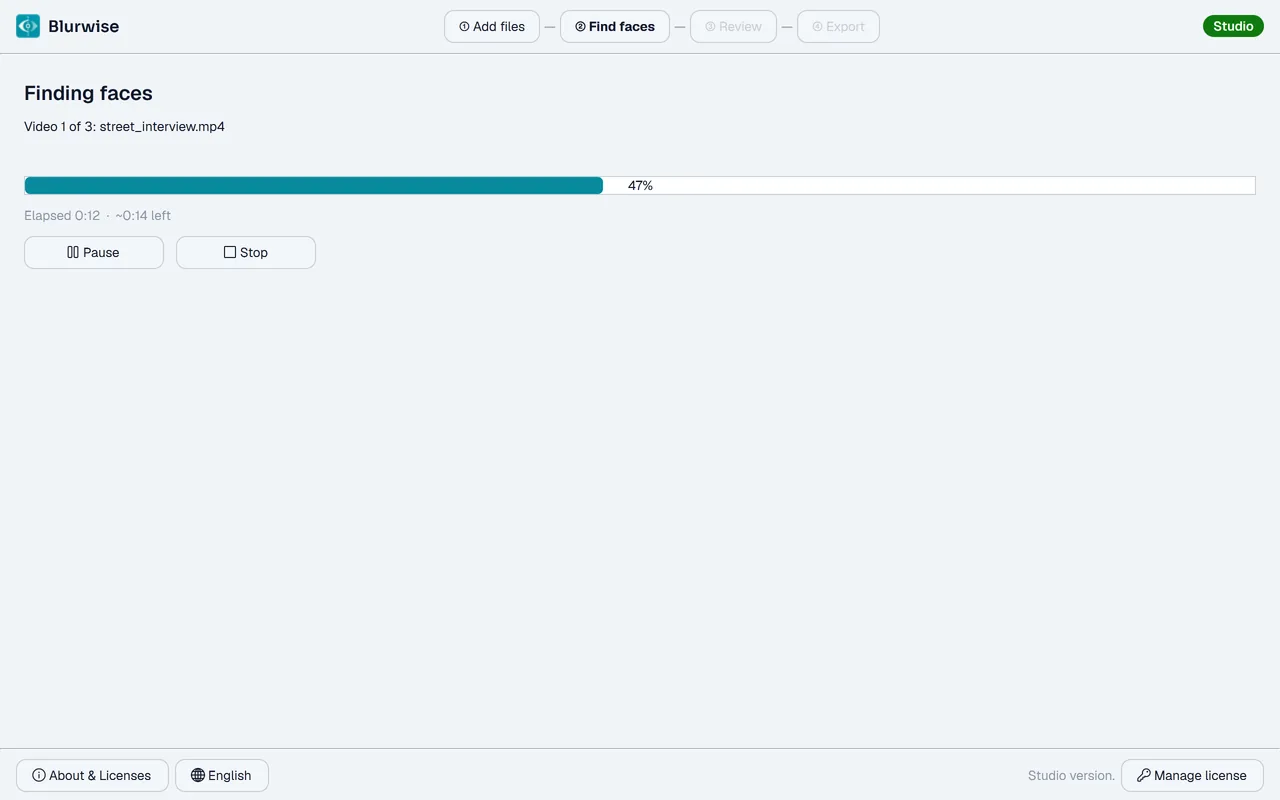
Let it find the faces
Blurwise scans each file with an on-device neural network, finding and tracking every face frame by frame. It all runs on your computer — nothing is uploaded. You can pause or stop anytime, and results are cached so going back never re-detects.
Review every face
This is where you stay in control. Scrub the video and see the real blur, exactly as it will export. Each detected face is a row on the right — one decision per person for the whole clip. Click a box on the video to toggle it: solid red will be blurred, a green ✕ is left visible. “Blur all” and “Blur none” handle a crowd in a single click.
- The preview is the real result — what you see is what you get.
- Hold the step buttons to move frame by frame, or press 2× or 4× to cover ground faster. Only the preview skips: the export keeps every frame.
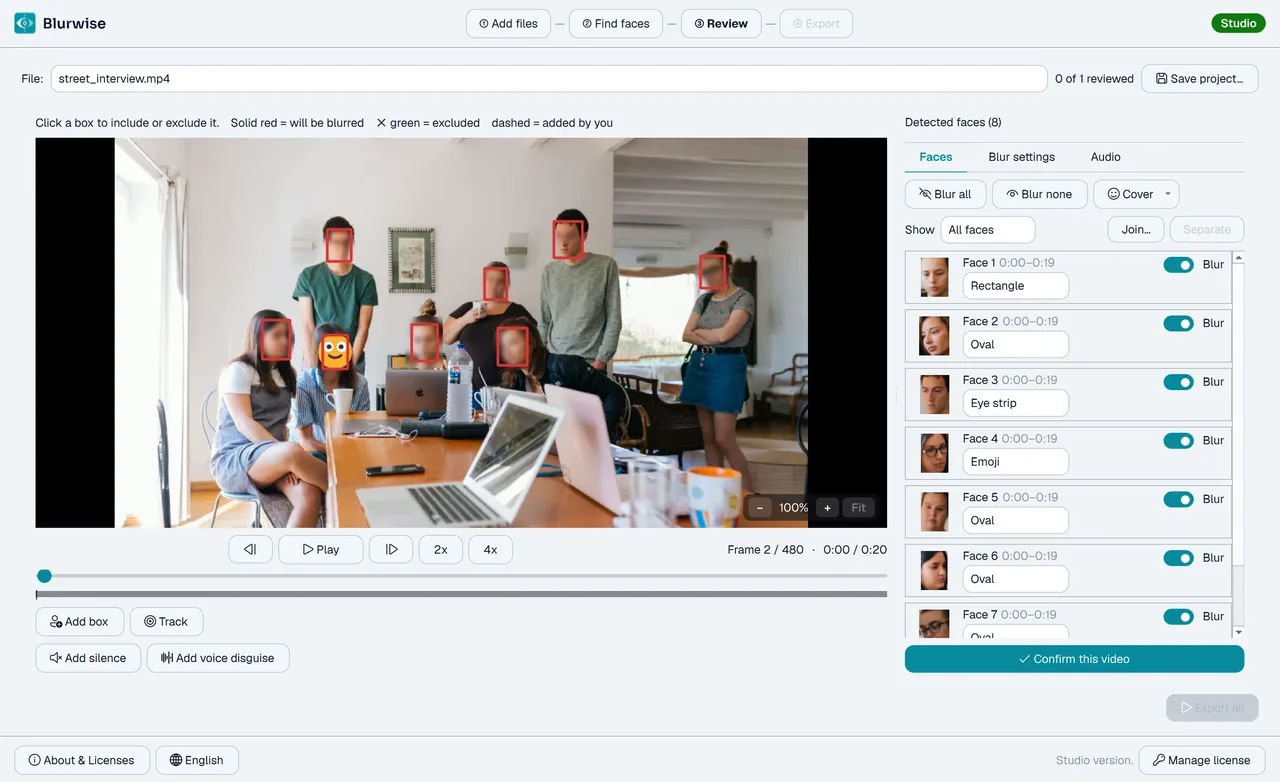
Choose how to cover each face
Per face, pick a cover style: a rectangle, an oval, a thin strip over just the eyes, or an emoji / your own image laid on top. Whatever you choose, the face is always blurred underneath — so nothing shows through if an image has transparent areas or the box shifts.
- Rectangle and oval are available on every version.
- Eye strip, emoji and custom images need Pro or Studio.
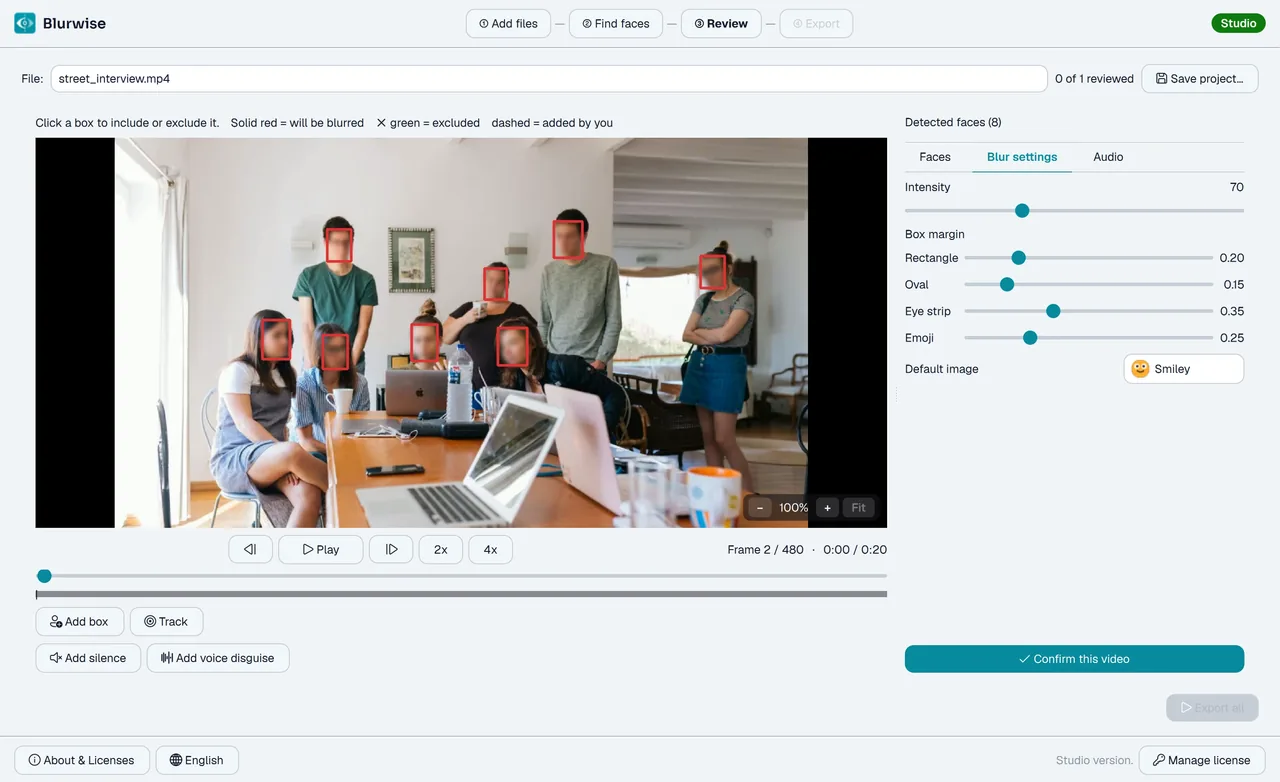
Fine-tune the blur
In the Blur settings tab, set how strong the blur is and how far each box reaches beyond the face. Every cover style has its own margin: a rectangle needs room for hair and ears, while an eye strip that wide would reach past the temples. Move a slider and the preview updates straight away.
- Your settings are remembered for the next video.
- Rectangle and oval margins are on every version; eye strip and emoji need Pro or Studio.
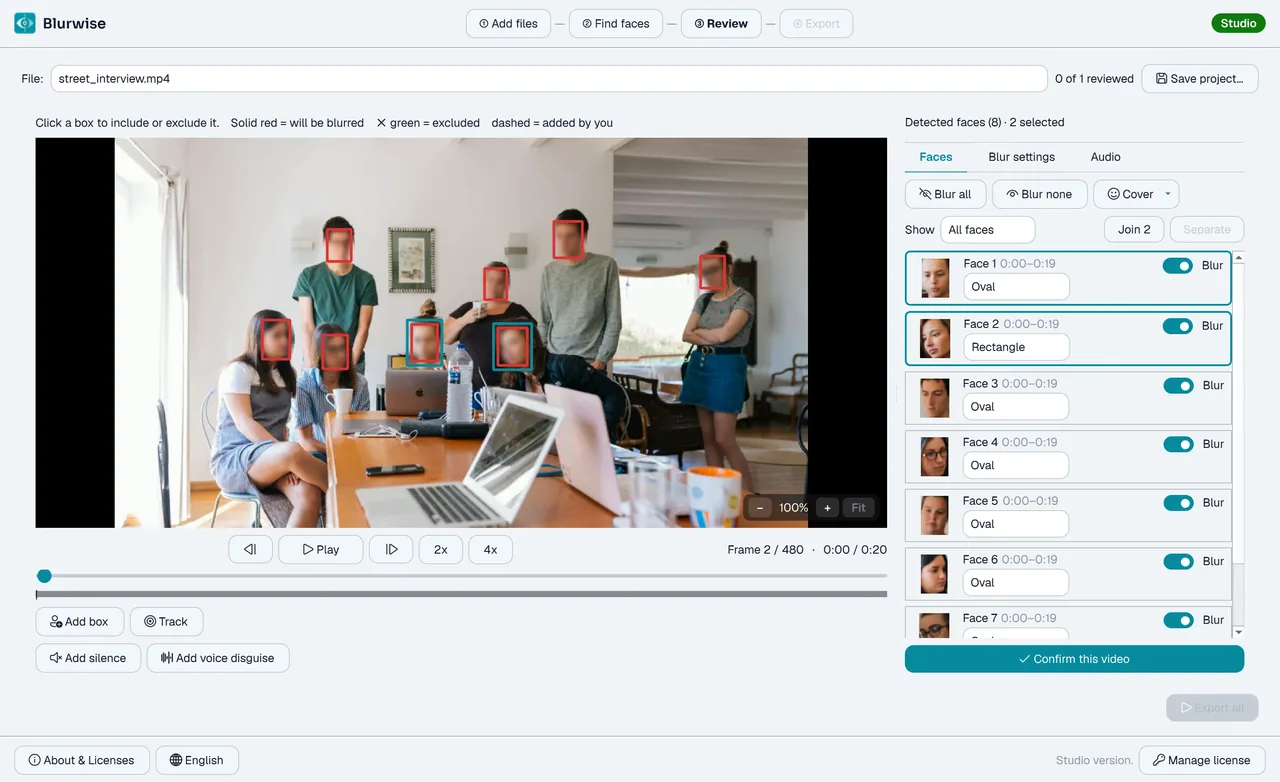
Change many faces at once
In a crowd, pick the faces to change together: Ctrl+click rows one by one, or Shift+click to take every row between two. Switch blur on or off, or choose a cover, on any of them and the change applies to all of them. A plain click or Esc clears the selection.
- “Show” above the list narrows it to the faces to check, the blurred ones or the ones left visible.
- Faces marked “Check” deserve a second look: the detector was unsure, or saw them only briefly.
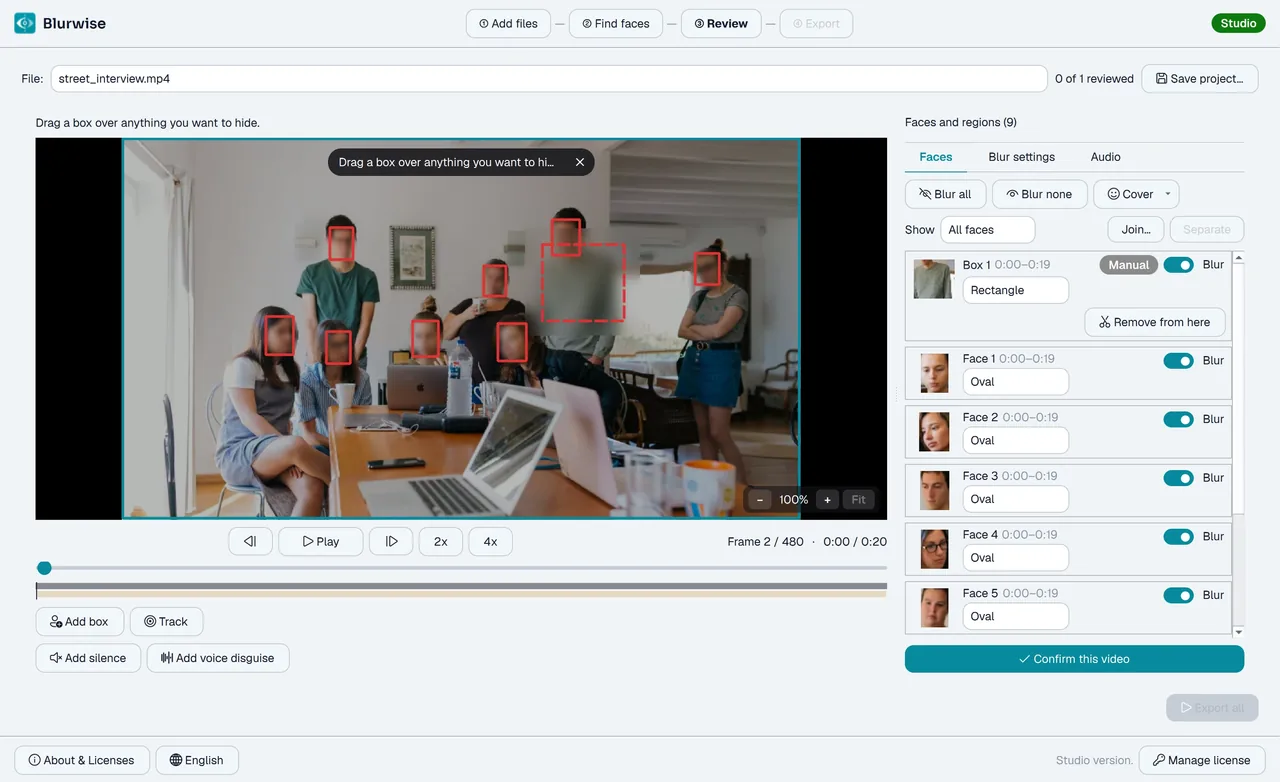
Patch anything it missed
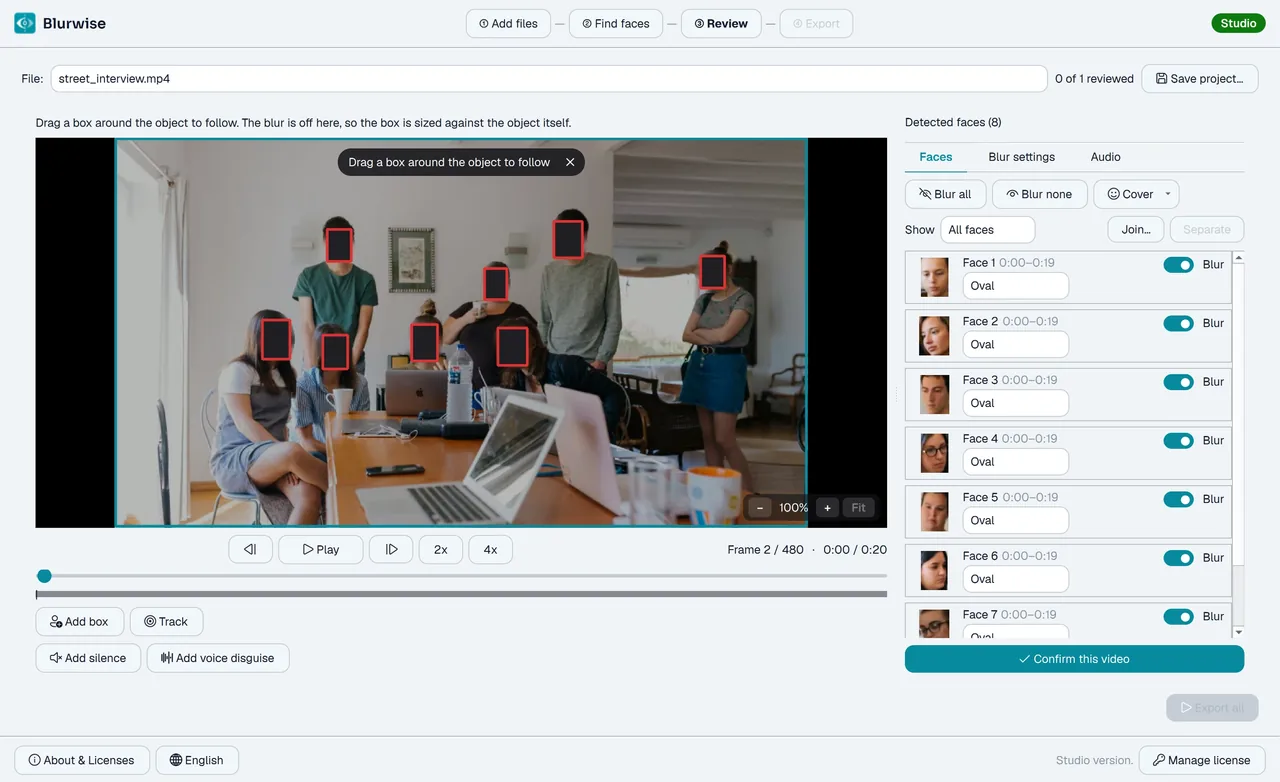
If the detector misses a face — a hard angle, motion blur, someone at the edge — press Add box and drag a box over it. It works for anything, not just faces: a document, a plate, a screen. Move or resize it on a later frame and it glides there smoothly, covering everything in between. Nothing left uncovered. Del removes a box you drew, and Ctrl+Z brings it back.
Follow an object
Number plates, badges, documents, screens — anything the face detector won’t catch. Press Track, draw a box around it, adjust it until it fits and press Start: Blurwise follows it frame by frame, and the box grows and shrinks with the object. If it loses the object, the box holds its last position so nothing slips into the clear until you say it leaves the shot.
Join a face that was lost for a moment
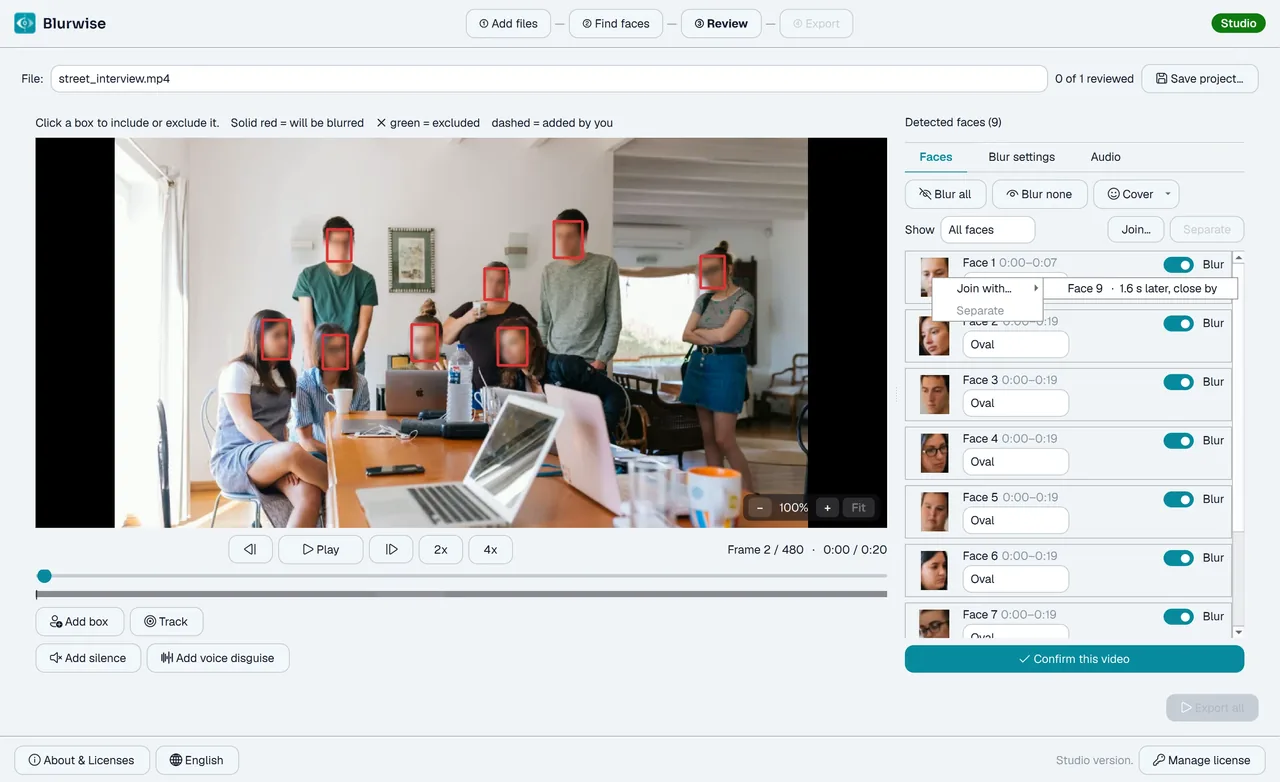
When someone turns away or is hidden for a moment, they can come back as a new row. Select both rows and press Join… above the list — or right-click the first row and choose Join with…, where the most likely match is at the top. The two become one face, and the moment in between is covered too. Separate undoes it.
- The covered moment shows hatched on the timeline under the video, so you can check it.
Disguise voices and silence audio
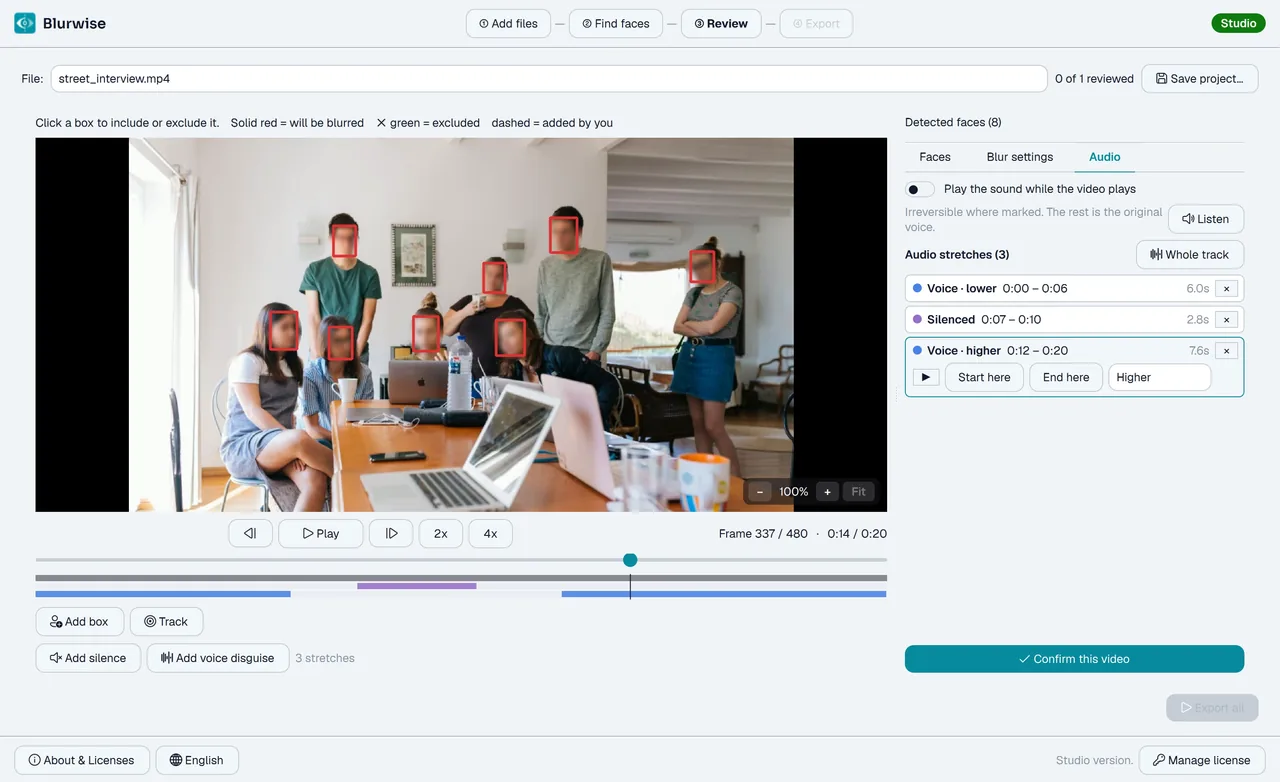
A blurred face still leaks identity through the voice. Under the video, “Add voice disguise” marks a stretch at the playhead and disguises it irreversibly, and “Add silence” mutes one — for a name, address or phone number said out loud. Every stretch is listed in the Audio tab: move its edges with Start here and End here, remove it with ✕, and give each speaker their own tone, from Much lower to Much higher, so several people can still be told apart. “Whole track” disguises the entire recording.
- Normal playback plays the original voice: press ▶ on a stretch, or Listen, to hear it exactly as it will export.
- Turn on “Play the sound while the video plays” to follow the footage by ear; silenced stretches stay silent.
- Every tone is equally irreversible — the disguise is just as strong whichever you pick.
Export the result
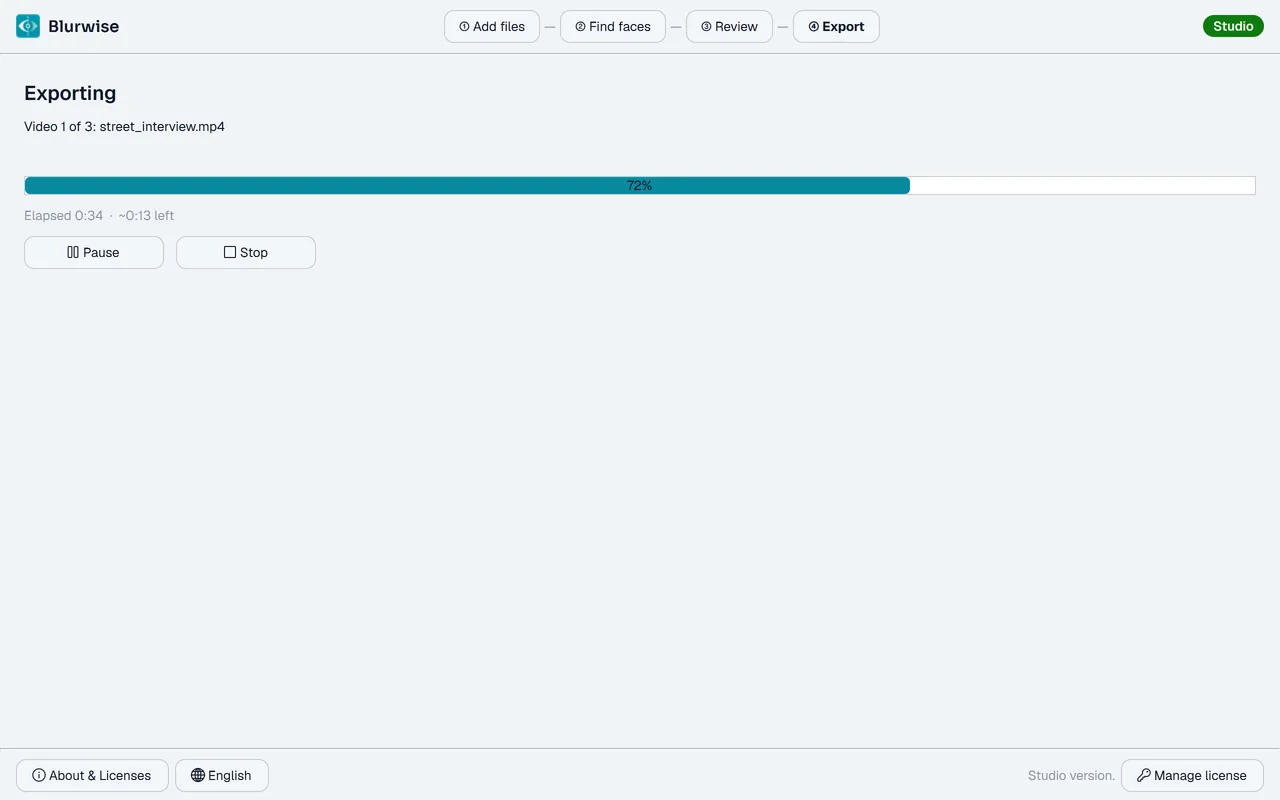
One click on “Export all” and Blurwise writes the finished files to your output folder, in sequence, reusing the analysis — no re-detection. If you kept the record on, a text file with the SHA-256 of the source and the result is written beside each export, so what was done can be checked later.
- Videos come out as MP4 (H.264), which plays everywhere. HDR sources are converted to standard colours and 1080i camcorder footage is deinterlaced along the way.
Change your mind after exporting
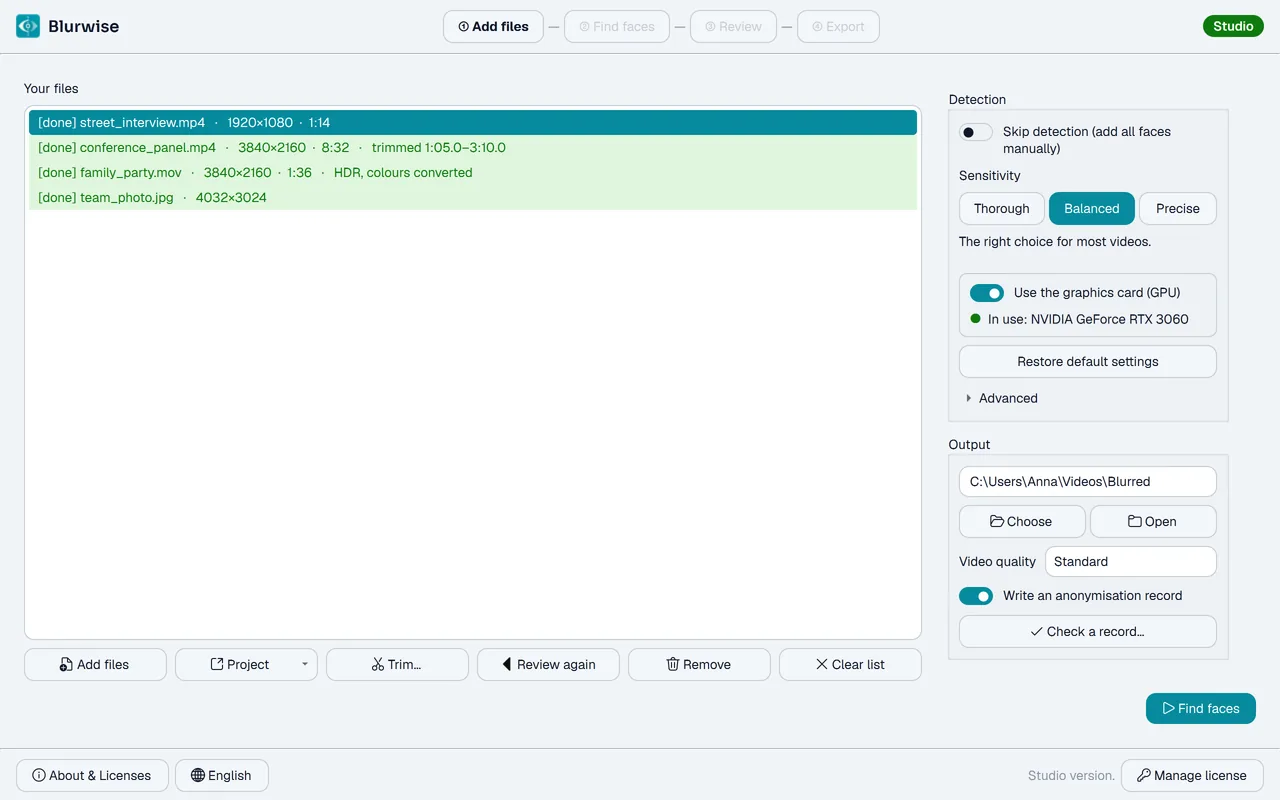
Finished files turn green in the list. Spotted one more face while watching the result? Select the file and press Review again (or right-click it): it goes back into the list, and your per-face choices, hand-drawn boxes and audio stretches come back exactly as you left them, with nothing detected again. The new export is saved beside the first one, never over it.
- If you change a detection setting first, the faces are found again: your blur look, margins, audio stretches and hand-drawn boxes carry over, and each face starts blurred.
Save your work and come back to it
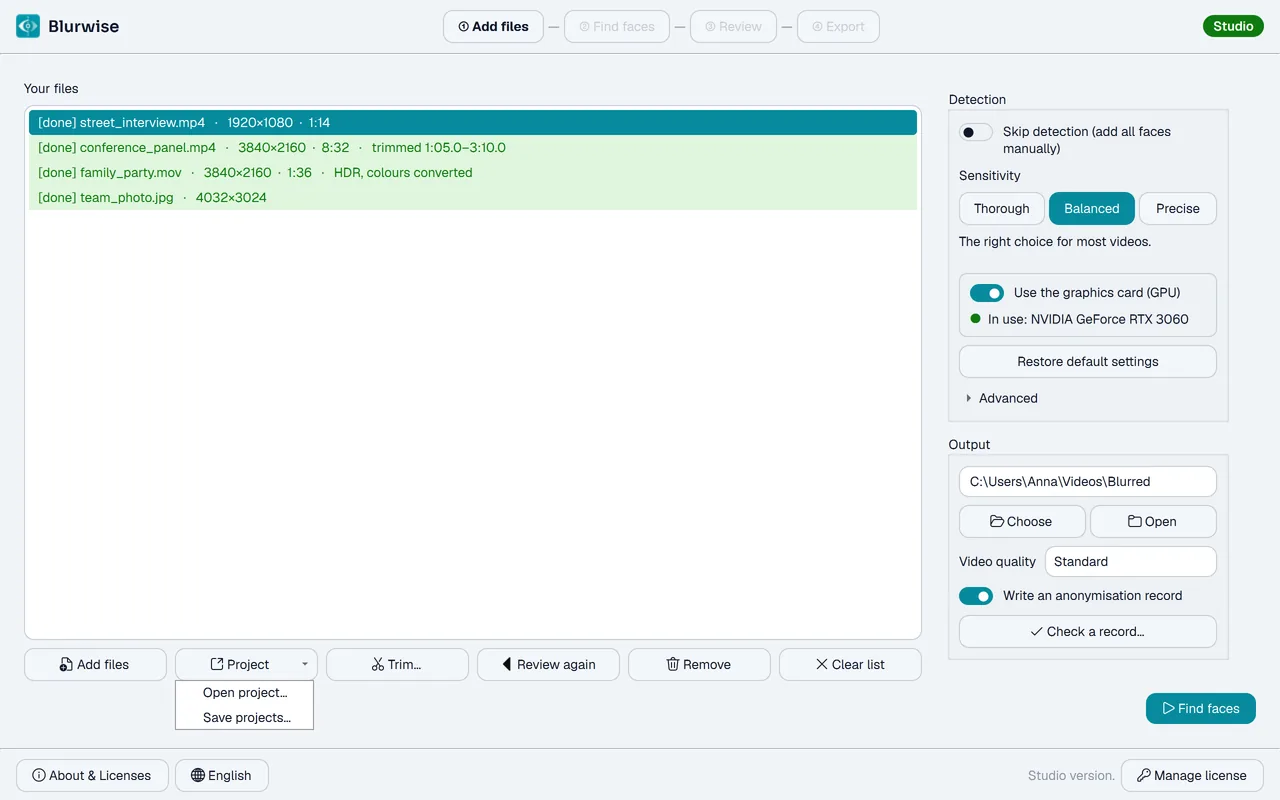
A project keeps the faces found and every decision, so you never have to find them again. Use Save project… in the review, or Project ▸ Save projects… on the first page — after an export too. Every file of the review goes into one project, and reopens with it. Ctrl+S saves from either page, and Blurwise asks before closing if something isn’t saved. Project ▸ Open project… brings it back, straight to the review.
- Opening a project works on every version; saving one needs Pro or Studio.
- A project is a small file kept next to your video; the video itself isn’t copied into it.
Good to know
Three versions, same protection
Free, Pro and Studio differ in how much work you can do — the anonymisation itself is identical on all three.
Always up to date
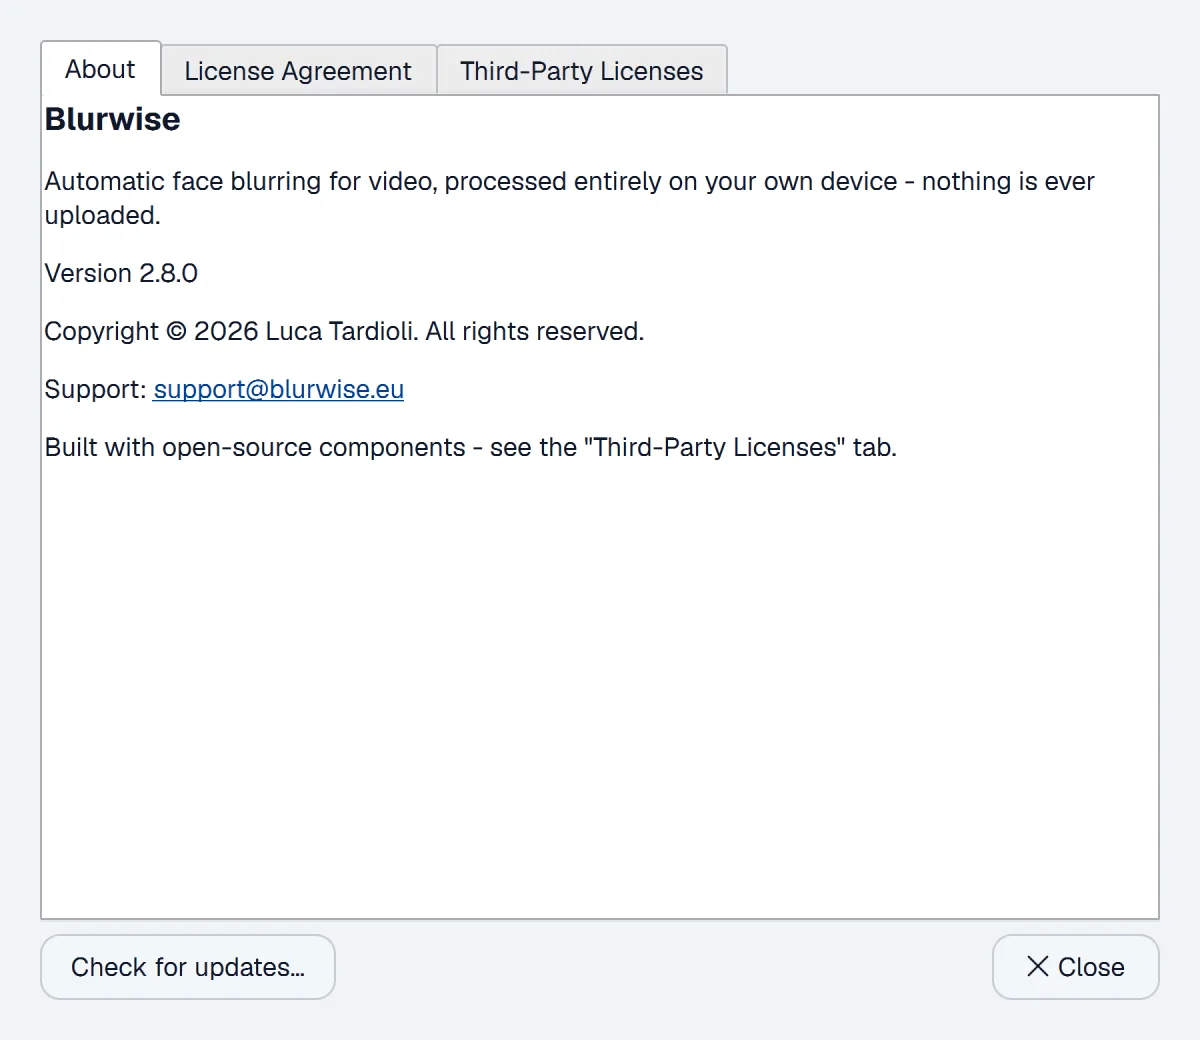
Check for updates, in About or Manage license, tells you when a new version is out and installs it for you — only when you ask. If your licence doesn’t include it, Blurwise tells you so instead of installing it.
Ready to try it yourself?
Download Blurwise Free and blur your first video in minutes — no account, no upload, no watermark.